Table of Contents
- Connect to the VPN
- Connect to the OpenStack dashboard
- Tutorial: creating your first VM
- Tutorial: accessing Meluxina from your VM
- Tutorial: exposing a service through the VPN
- Tutorial: adding a new keypair to Openstack
- Troubleshooting: Common questions
- VPN connection issues
Connect to the VPN:
Once you have received your OpenVPN configuration file you can use it to connect to your private cloud using various clients:
On linux you can use OpenVPN, usually installing it via your distribution package manager, e.g,:
sudo apt install openvpn
and from the terminal:
openvpn --config /path/to/u100000.ovpn
On Windows you can download: OpenVPN Connect
On Mac you can use tunnelblick: tunnelblick
You will be asked for a username and password to connect to the VPN, these are your userid and associated password.
Once you are connected to your VPN, you can access your central dashboard via dashboard.cloud.lxp.lu
Once on the VM you can access the slum restAPI through https://slurm.cloud.lxp.lu.
For further documentation about the slurm restAPI please refer to slurmrestd documentation.
Connect to the OpenStack dashboard:
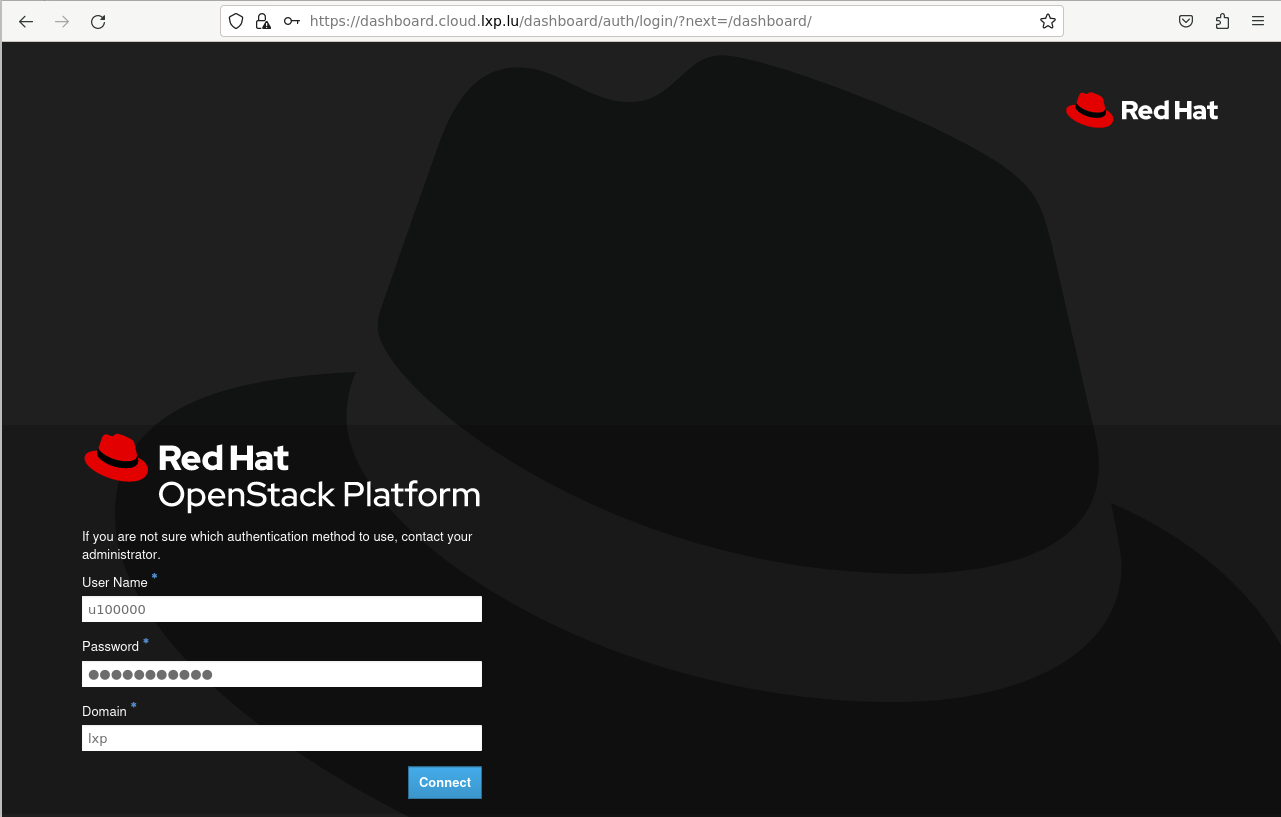
While on the VPN, you are able to connect to dashboard.cloud.lxp.lu
and connect using your user id and password using the lxp domain:
Tutorial: creating your first VM:
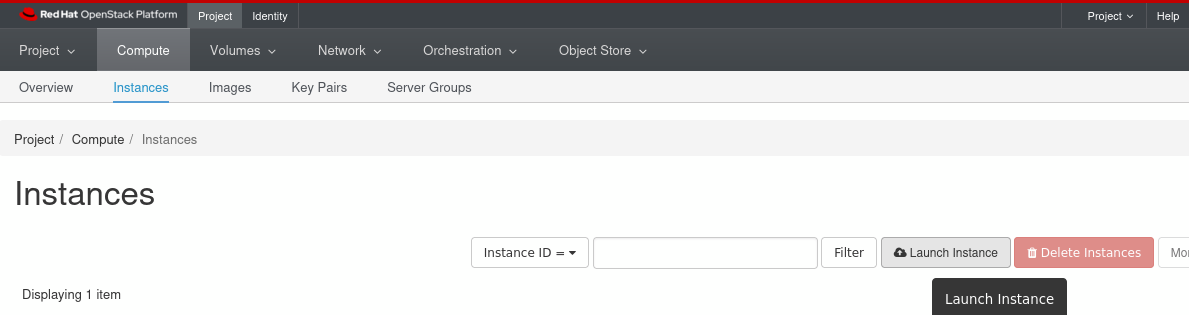
Head to the dashboard and go to the compute/instance panel. Click the Launch Instance button:
Steps:
- In Details: Select a name for your VM.
- In Source: Select the base OS Image for your VM, additionally you can either use a volume and select an arbitrary disk size or use the image as base.
Note: If we you are entitled to using GPUs on OpenStack, additional images (ubuntu2404-gpu and rocky94-gpu with GPU driver support) and flavors (30.1gpu for VMs with 1 GPU and 60.2gpu for 2 GPUs) are available
for selection. Proceed normally with the rest of the installation selecting these images and flavors and you'll be greated with a VM coming with CUDA, nvidia-smi and other tools ready for you to use.
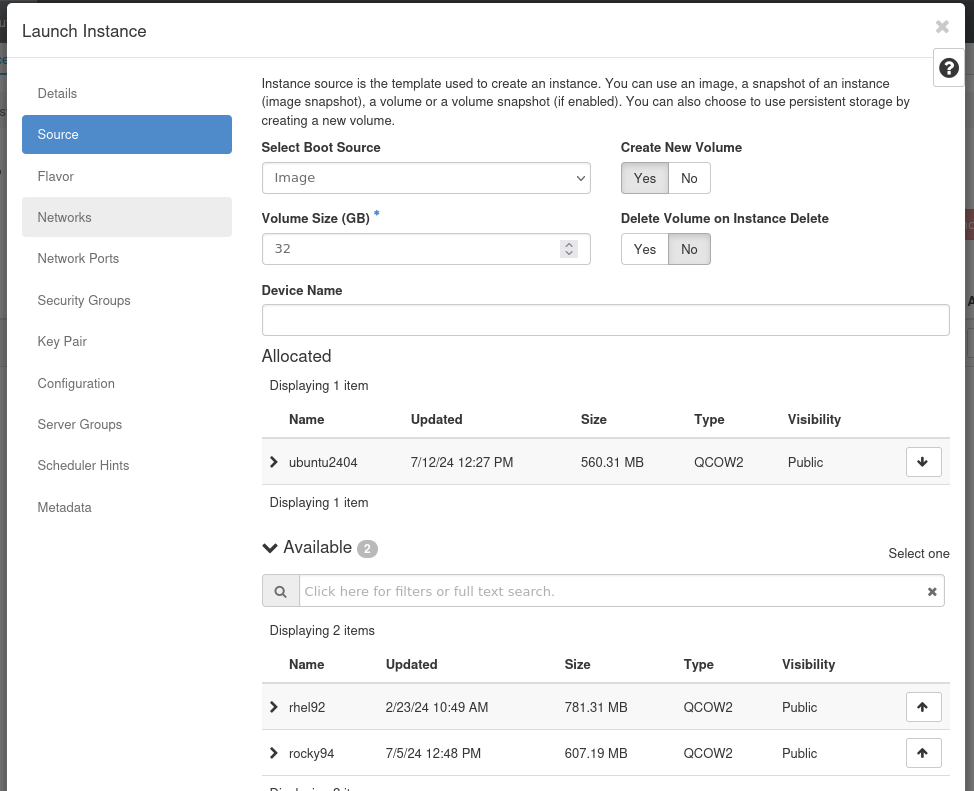
Note: We offer generic ubuntu, rocky and rhel images but you can upload your own images.

Note: A warning sign on a specific resource, e.g, on vCPUs for xlarge and xxlarge in this image means that you don’t have enough resources to select this instance.
When these are selected, you can click on Launch instance on the bottom right corner and your instance will be created.
Once your instance is created, you can access it via ssh with the key you used when creating your instance.
To find your VM IP address, head back to the instance panel in the dashboard. In the IP Address section: e.g., in the screen capture 10.40.11.195

rhel92 images use the default account cloud-user. rocky94 images use the default account rocky. ubuntu2404 images use the default account ubuntu.
To connect on our ubuntu instance:
ssh -i <path/to/ssh-privatekey-keypair> ubuntu@10.40.11.195
Tutorial: accessing Meluxina from your VM:
You are allowed on the machine to spawn services that will listen on non protected ports: 1024 - 65356.
Let’s head to the login.lxp.lu and start an interactive job:
# First get an allocation on the machine
[u100000@login02 ~]$ salloc -A p200000 -p fpga -N 1 -t 00:05:00 -q short
salloc: Pending job allocation 1057061
salloc: job 1057061 queued and waiting for resources
salloc: job 1057061 has been allocated resources
salloc: Granted job allocation 1057061
salloc: Waiting for resource configuration
salloc: Nodes mel3009 are ready for job

# Once on a machine node start an http server to emulate a service
[u100000@mel3009 ~]$ python3 -m http.server 8080
Serving HTTP on 0.0.0.0 port 8000 (http://0.0.0.0:8080/) ...
From your VM: you can now access this server from mel3017.meluxina.lxp.lu
ubuntu@my_first_vm:~$ curl mel3017.meluxina.lxp.lu:8080
<!DOCTYPE HTML PUBLIC "-//W3C//DTD HTML 4.01//EN" "http://www.w3.org/TR/html4/strict.dtd">
<html>
<head>
[u100000@mel3009 ~]$ python3 -m http.server 8080
Serving HTTP on 0.0.0.0 port 8000 (http://0.0.0.0:8080/) ...
10.40.0.223 - - [12/Jul/2024 12:24:38] "GET / HTTP/1.1" 200 - < The server did recieve the request
Tutorial: exposing a service through the VPN
This tutorial involves creating a security group and associating it to your VM running the service you wish to expose through the VPN. We are going to expose a service on port 8080.
Note: Your services are exposed by default to the machine, no action needs to be taken to access your cloud services via the machine. We strongly advice you do not edit your default security group as this could result in loss of connectivity to your private cloud.
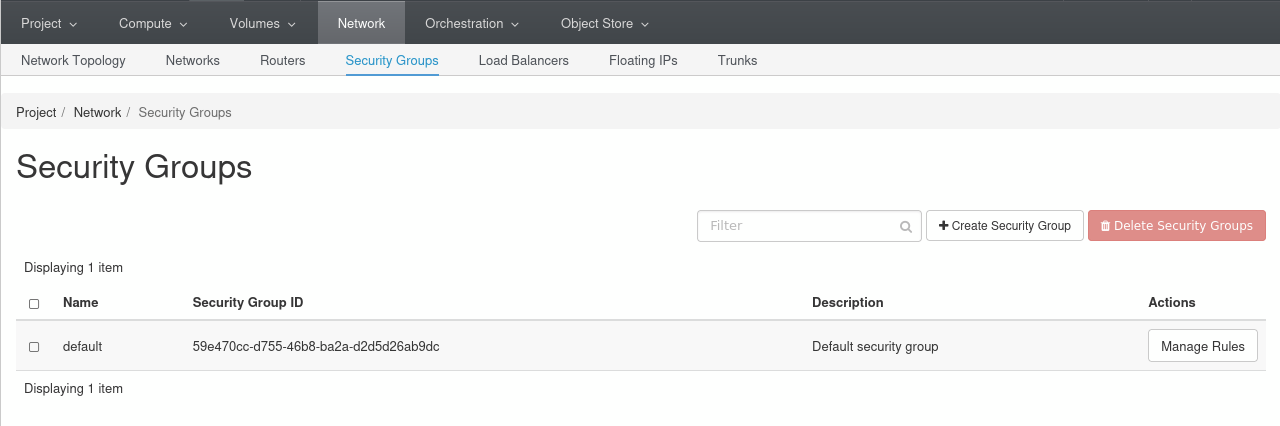
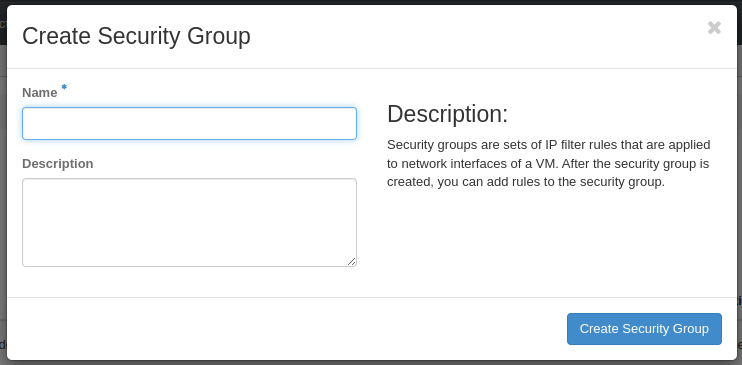
- Head to the network panel in the security group section and click on Create Security Group button on the top right:
- Select a name for your Security Group.
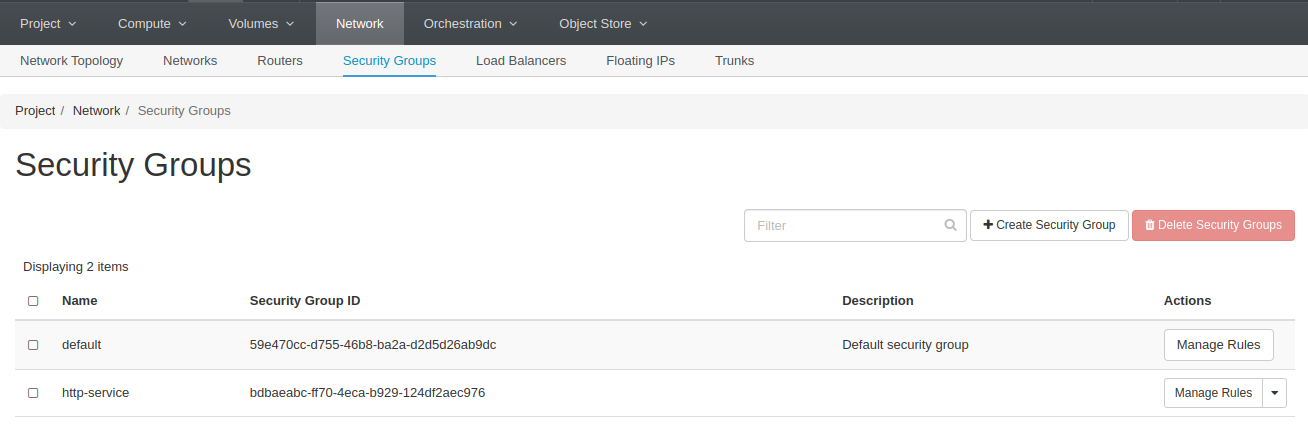
- You are back on the security group panel and can now click the Manage Rules button for our new http-service security group:
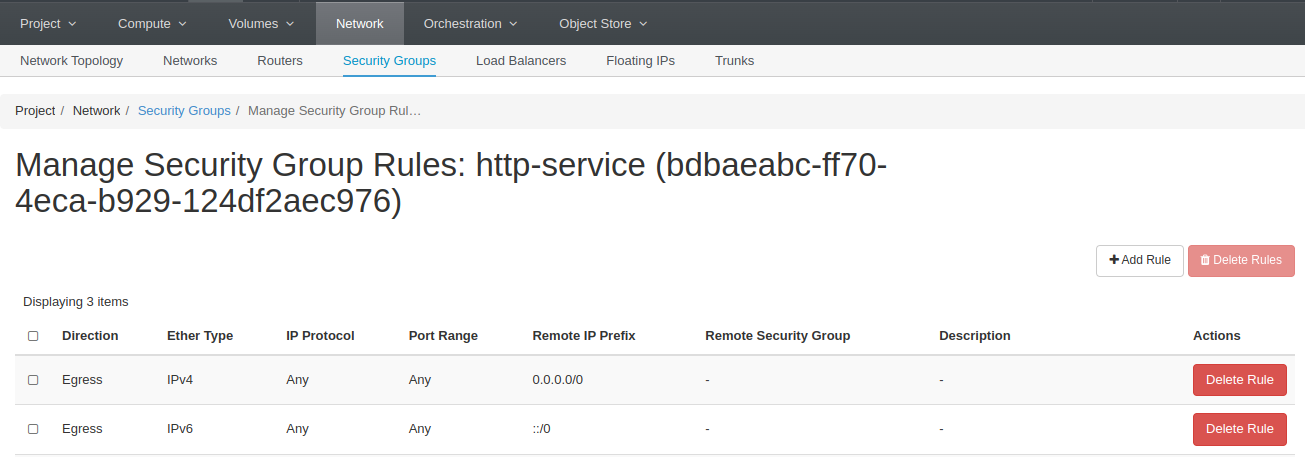
Note: by default, Openstack creates for you 2 default egress rules, you are free to remove them or let them as is, they have no impact as they are already included in your default security group.
- Click on the Add Rule button in the top right corner.
You can select in the Rule drop down menu either standard protocol like HTTP and HTTPS. For this tutorial we are going to expose an http server on port 8080. So we want to select Custom TCP rule. We are going to fill the new rule like so:
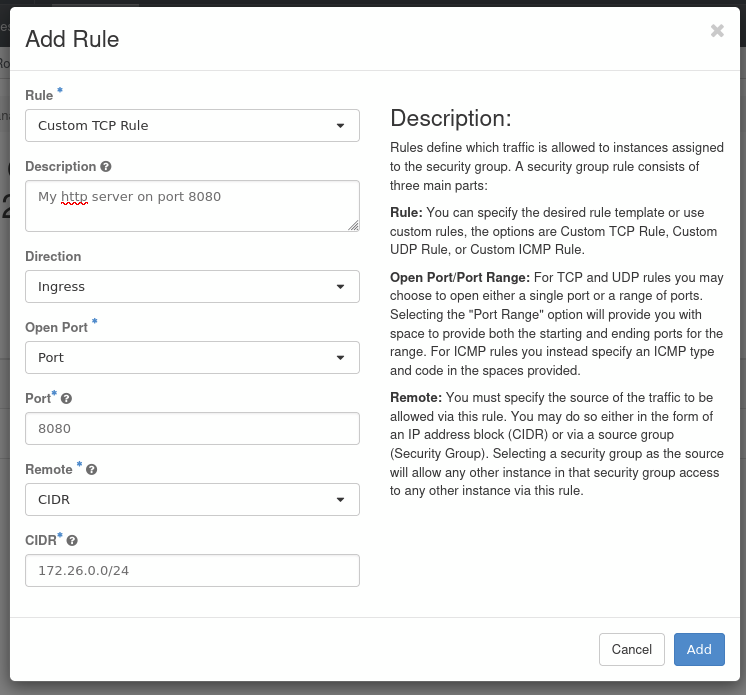
You can define a Remote allow list in two ways: either as a Classless Inter-Domain Routing (CIDR) address range or as a security group. - CIDR: A range of IP you want to allow access to your service, e.g, your local IPs while connected to your VPN is 172.26.0.0/24 - Security group: This allows you to permit connection to your service to any VM that shares a given security group. By default your VMs have interconnection between themselves, so this type of Remote is less useful in our setup.
Note: The security groups are meant to **allow** network access to your VMs. You are still responsible for the security and authentification of these services.
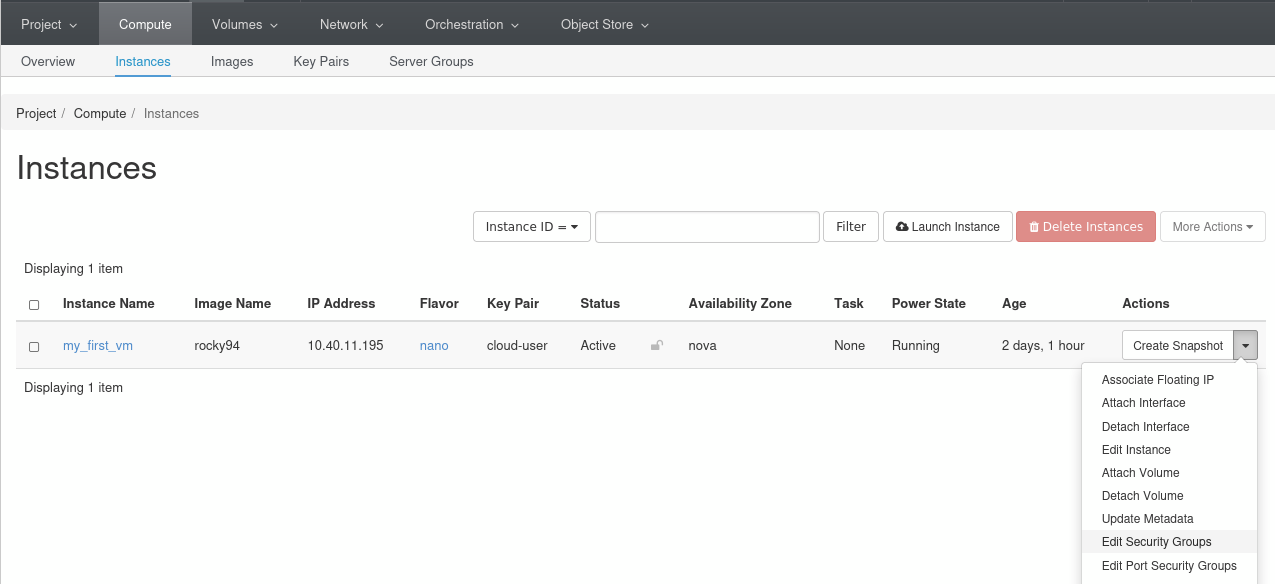
Once your security group and your rules are created you can head back to the compute panel in the instance section.
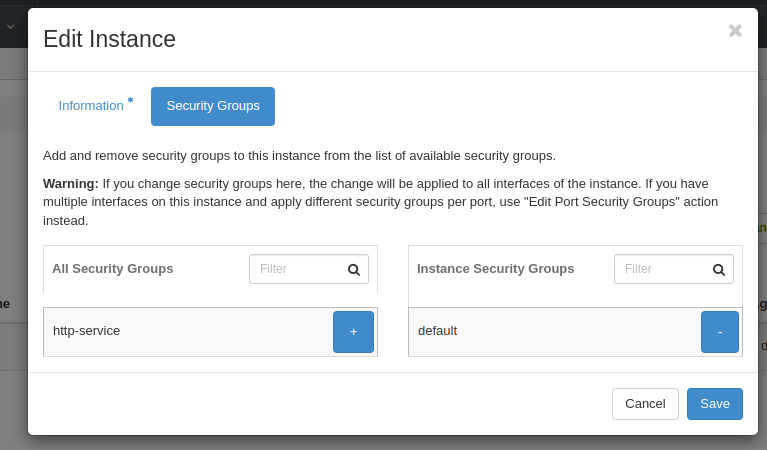
Select for the VM you want to apply the security group to the Edit Security Groups option:
Apply the http-service security group to your instance by clicking the + icon
Once the security group is applied you can call your service from your VPN connected client:
curl 10.40.0.195:8080
<!DOCTYPE HTML PUBLIC "-//W3C//DTD HTML 4.01//EN" "http://www.w3.org/TR/html4/strict.dtd">
<html>
<head>...
Tutorial: adding a new keypair to Openstack
Key Pair are resources in OpenStack used to store your ssh keys public components for you. They are injected at creation time in your VMs. OpenStack can not inject new keypairs to already running VMs.
Note: If you loose the private key associated with your Key Pair, we cannot retrieve it for you or help you regain access to the VMs that rely on this keypair.
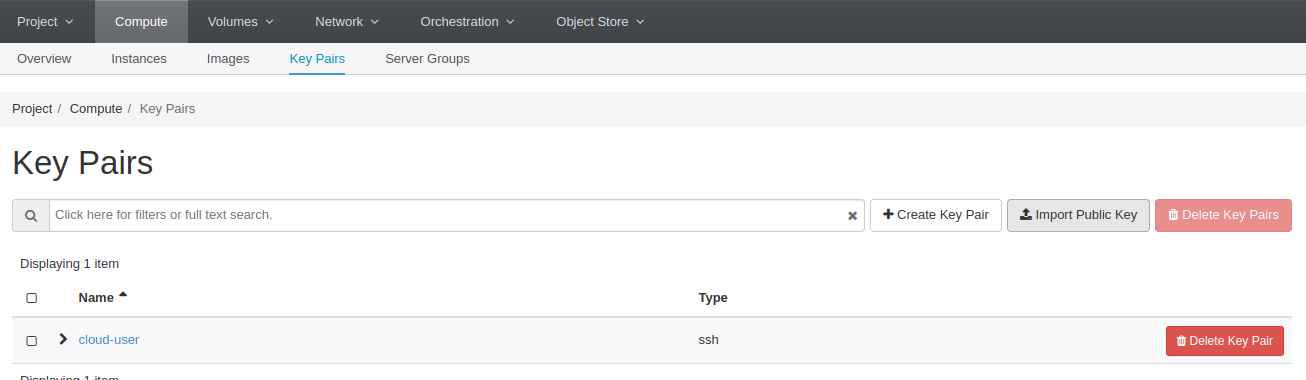
Head to the compute panel in the Key Pairs section. Click the Import Public Key button.
and fill the form as so:
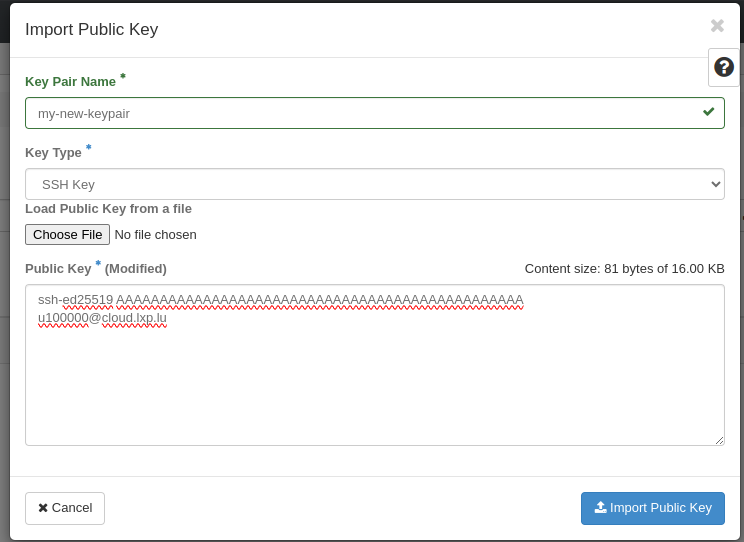
You can now use this new key pair when you create new instances.
Note you can also ask OpenStack to create Key Pairs for you using the **Create Key Pair** button. Select the SSH type. Be aware that the dashboard will download your private key for you, but it will not store it. Do not loose this private key.
Troubleshooting: Common questions
Can't SSH into my VM
A good first step is to look in the instance panel:
- Click on your VM and review the Log, Action Log and Overview Panel.
- You can check the console panel to verify your instance is running, if you have local accounts with password you can connect through there:
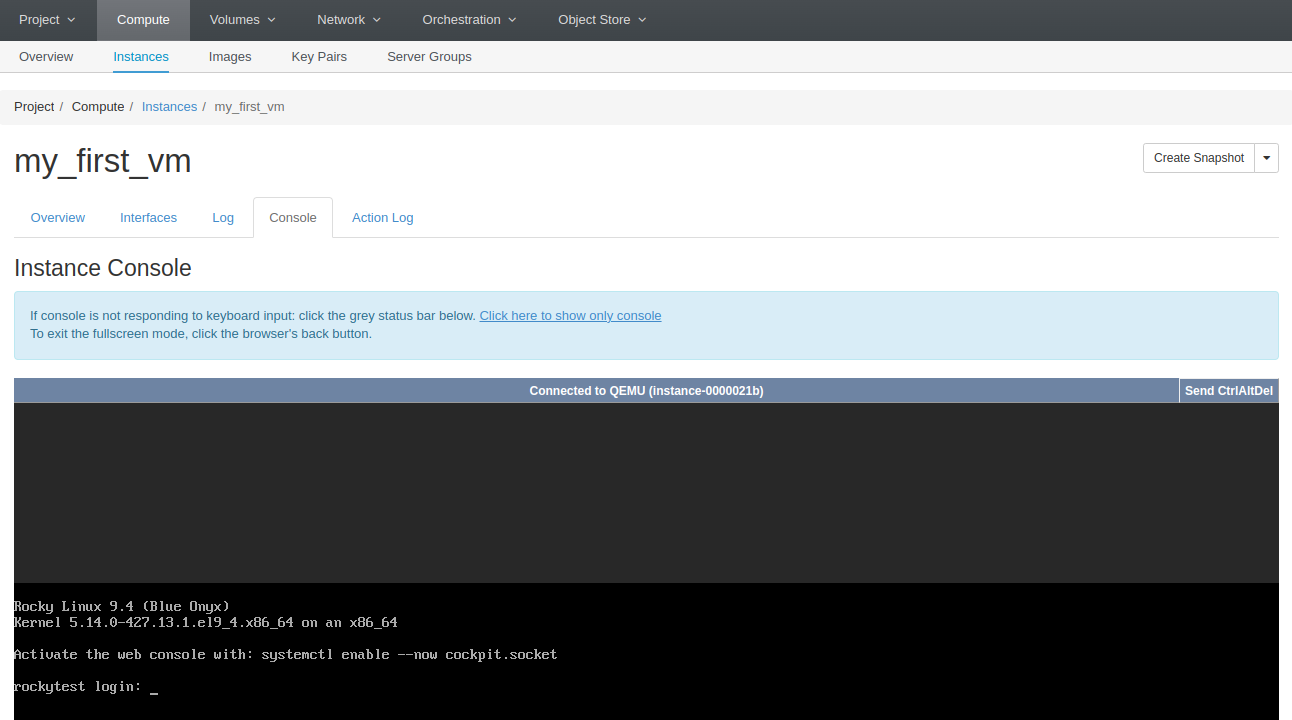
Note: By default there are no local account with a password set.
Can't access my service
A good first step is to look in the instance panel:
- Click on your VM and review the Overview Panel:
You can see all your applied security group from here:
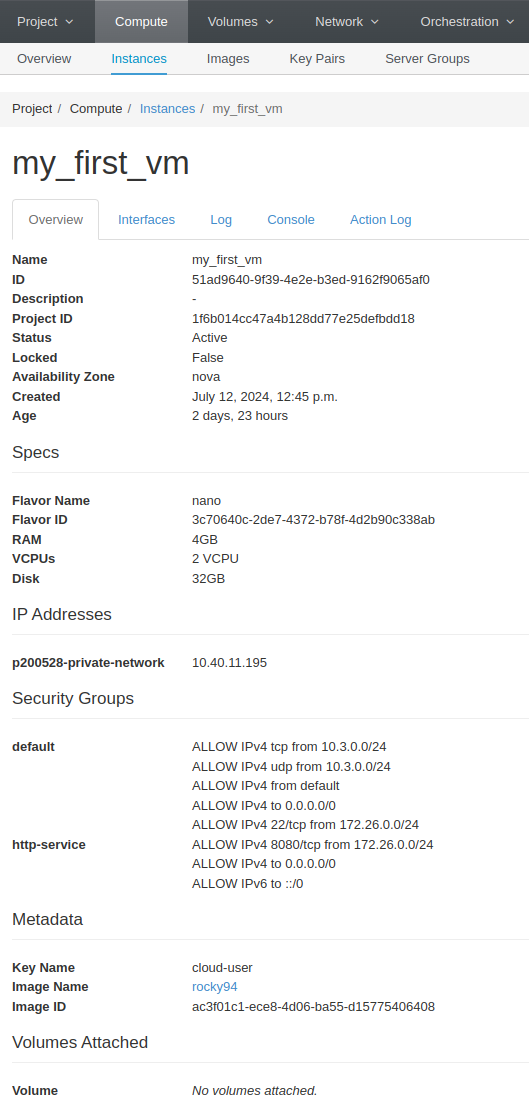
Ensure that your access is allowed in this list.
I lost my Key associated with my Key pair. How can I gain access to my VM again?
We do not offer support in that case. We cannot access your VMs on your behalf so we are not able to replace your allowed ssh keys for you. In case you loose access to your VM, there are some cases where you will be able to recover, but by default your easiest way out is to create a snapshot or your VM and recreate a new VM based on this snapshot.
This will incure loss of state, VM downtime and might not work at all based on your base Image.
I deleted the default security group of my OpenStack project:
Open a ticket with our customer support.
VPN connection issues:
We do not offer support for VPN connection related issues. Nevertheless if you are getting connection issues and believe this might be related to our infrastructure, please make sure to include your VPN client logs in your ticket.
- For Linux:
By default OpenVPN outputs its errors to stdout, copy and pasting the text from the client to the ticket could help greatly diagnose your issue.
e.g:
openvpn  --config ./u100000.ovpn
2024-07-15 12:15:34 --cipher is not set. Previous OpenVPN version defaulted to BF-CBC as fallback when cipher negotiation failed in this case. If you need this fallback please add '--data-ciphers-fallback BF-CBC' to your configuration and/or add BF-CBC to --data-ciphers.
2024-07-15 12:15:34 OpenVPN 2.5.9 x86_64-pc-linux-gnu [SSL (OpenSSL)] [LZO] [LZ4] [EPOLL] [PKCS11] [MH/PKTINFO] [AEAD] built on Jun 27 2024
2024-07-15 12:15:34 library versions: OpenSSL 3.0.2 15 Mar 2022, LZO 2.10
Enter Auth Username: u100000
Enter Auth Password: **********
2024-07-15 12:15:43 TCP/UDP: Preserving recently used remote address: [AF_INET]10.4.0.16:1194
2024-07-15 12:15:43 Attempting to establish TCP connection with [AF_INET]10.4.0.16:1194 [nonblock]
2024-07-15 12:15:43 TCP connection established with [AF_INET]10.4.0.16:1194
2024-07-15 12:15:43 TCP_CLIENT link local (bound): [AF_INET][undef]:0
2024-07-15 12:15:43 TCP_CLIENT link remote: [AF_INET]10.4.0.16:1194
2024-07-15 12:15:43 Connection reset, restarting [0]
2024-07-15 12:15:43 SIGUSR1[soft,connection-reset] received, process restarting
...
